S84ex/86ex - WLAN Setup
First ensure WLAN interface is installed per instructions for S84-ex/S86-ex print engine or if the printer was shipped with one installed (Antenna will extend from Interface board on rear of unit). This also requires version 61.00.00.05 or later firmware is installed.
There are a couple of different methods you could use to perform the initial configuration of the WLAN interface either by the SATO All-In-One Tool via USB connection or via the webpage if connected via Wired Ethernet or Ad Hoc wireless connection* (*this is the default setting with Shipping default).
If using USB or Wired Ethernet, you will first need to change the Interface setting for designated port:
- Place printer OFFLINE and press [ENTER] to access menu
- Use directional arrow to cursor to INTERFACE mode and press [ENTER]
- At the PRESS ENTER KEY TO CHANGE / POWER OFF TO SAVE message in LCD, press [ENTER]
- At INTERFACE AUTO SELECT, select DISABLE and press [ENTER]
- At INTERFACE SETTING, use directional key to select YES and press [ENTER]
- At PORT SELECT, select DATA PORT and press [ENTER]
- For USB connection, use directional key to select USB and press [ENTER] – you can just press [ENTER] until you return back to INTERFACE MODE. Power OFF print engine and connect USB cable into USB interface on rear of the print engine.
- For Wired Ethernet connection, use directional key to select LAN and press [ENTER]
- The next option for LAN is to choose DHCP (ENABLED recommended if you are connected to network to obtain IP Address from network server) or if you know static Network settings, you can opt to DISABLE and enter IPv4 Address/Subnet Mask/Gateway information. Leave Ipv6 Resolution to AUTO and DEFAULT ROUTER as is, pressing [ENTER] until you return to INTERFACE MODE. Power OFF print engine and connect Ethernet cable to RJ45 Ethernet interface on the rear of the print engine.
- At this point you can power off the printer – wait until it powers completely down (~15 seconds) before powering print engine on
Refer to the next pages to use the SATO All-in-One Tool to configure the WLAN settings applicable to the WiFi network.
Using the SATO All-In-One Tool:
Use Auto-Discover or manually add printer to list of installed printer in the SATO All-In-One Tool (AIOT).
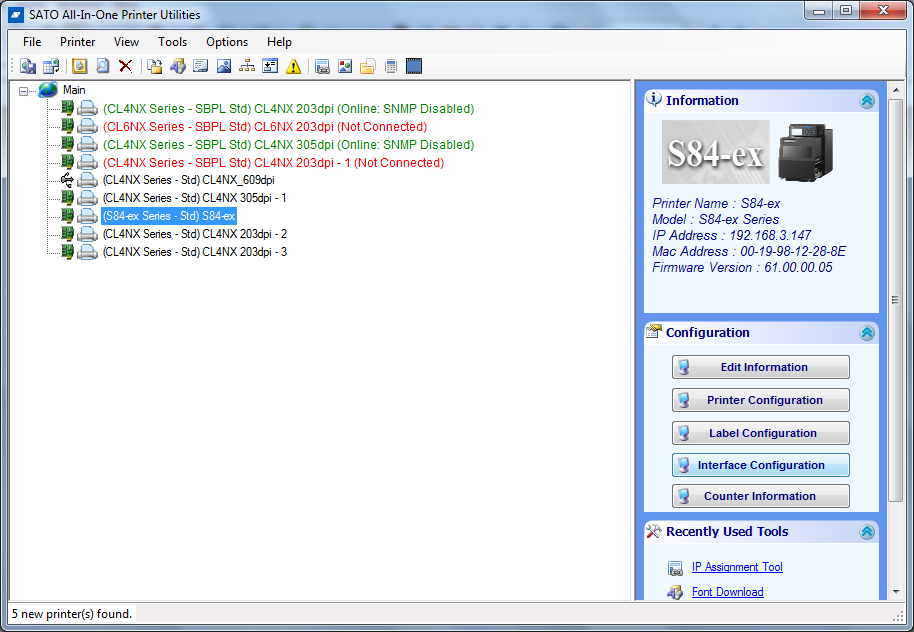
Once print engine is discovered/added to the list of installed printers, click the Interface Configuration button to configure the WLAN interface settings/parameters.
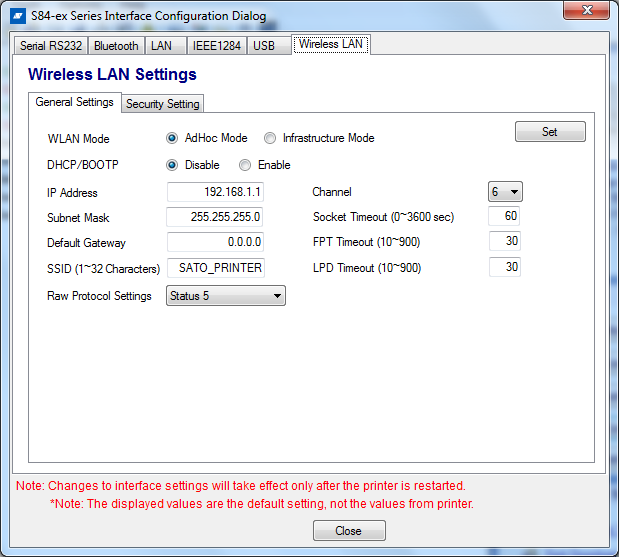
Click the Wireless LAN tab to define the network configuration settings and make needed to change.
NOTE: The displayed values are the default settings in the AIOT and do NOT represent values stored in printer.
As you will note, the values are defaulted to AdHoc Mode and other Printer Default values:
Make necessary changes to WLAN configuration (such as selecting Infrastructure Mode) and define the correct Wireless Network information, such as available IP address/Subnet/Gateway (Change DCHP/BOOTP to ENABLE will get IP address information automatically from network server) and SSID (case sensitive).
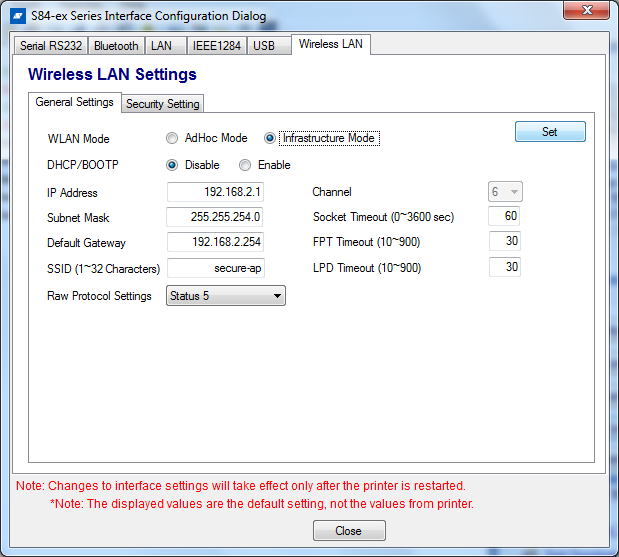
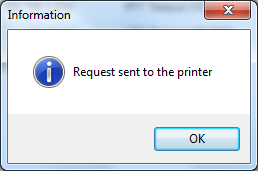
Click SET button to send General Settings for WLAN to printer and stored configuration parameters – once sent, you will get confirmation dialog:
Next, click the Security Setting tab to define any security/network authentication information. You will need to know encryption method and applicable key(s)/passphrase.
Click drop-down arrow to see available encryption options (e.g. WPA2) – the default is Open System (none).
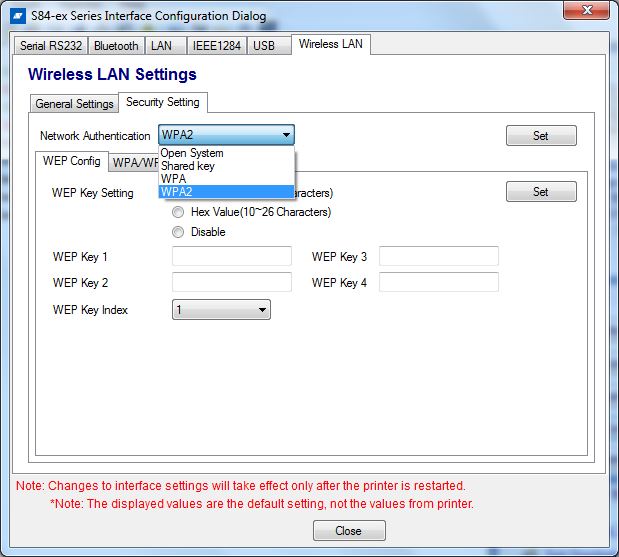
Click SET button
In the example, WPA2 was selected, so click the WPA/WPA2 Config tab to enter the encryption details and Key/Passphrase:
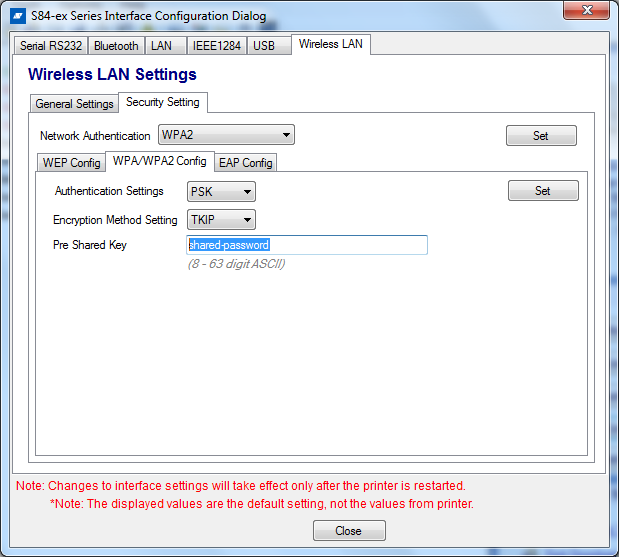
Click SET button
Once WLAN configuration/information has been sent to the S84-ex/S86-ex print engine, you will need to perform the following to place the print engine to use the WLAN interface settings:
- Place printer OFFLINE and press [ENTER] to access menu
- Use directional key to select INTERFACE MODE and press [ENTER]
- Press [ENTER] to advance into I/F Mode
- At Interface AUTO SELECT – DISABLE [ENTER]
- At INTERFACE SETTING – select YES [ENTER]
- Select DATA PORT and press [ENTER]
- select WLAN and press [ENTER]
- You can continue to press [ENTER] to advance through the WLAN information (which should display the settings defined in the AIOT setup)
- Cycle power OFF/ON (wait ~15 seconds to allow print engine to complete power off)
Once the print engine powers on, it will display the WLAN icon in the LCD with signal strength meter. If all parameters were entered/stored correctly, you will be able to ping the IP Address as well as enter the IP Address in web browser to access the printer’s home page:
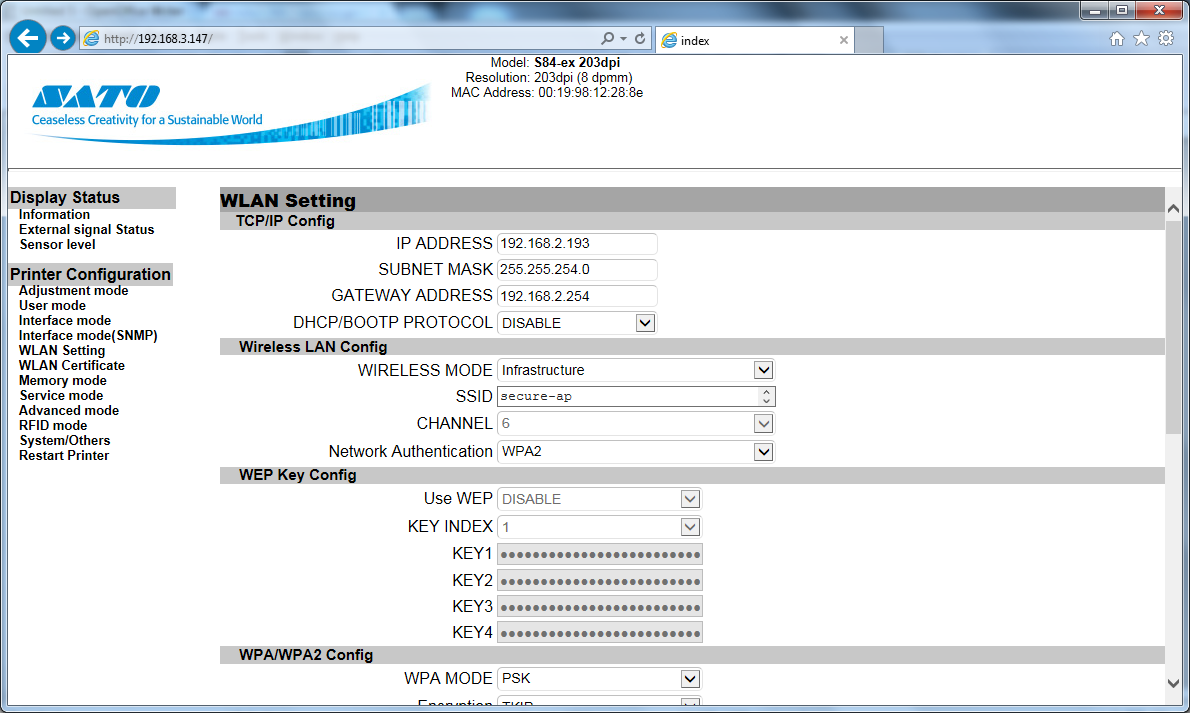
The default login credentials are admin for login name and admin for password. You could also use this method to configure the WLAN parameters via WIRED Ethernet connection connected to Network or Crossover cable.